
In the world of online shopping, visual appeal plays a crucial role in influencing buyer decisions. When it comes to selling products on Amazon, having high-quality product images is essential to grab the attention of potential customers. In this ultimate guide, we will explore the importance of product photography and provide you with valuable insights on setting up your own Amazon product photo studio.
Understanding the Importance of Product Photography
Visuals have always played a significant role in marketing and advertising. In the realm of online shopping, where customers cannot physically interact with the products, product photography becomes even more crucial. Customers heavily rely on product images to evaluate the quality, features, and overall appeal of the products they are interested in.
Before we begin: Every Amazon Seller needs a suite of tools for Keyword Research, Product Development, and Listing Optimization. Our top pick is Helium 10 and readers of this post can get 20% off their first 6 months by clicking the image below.

Product photography goes beyond just capturing an image of a product. It is an art form that requires careful consideration of lighting, composition, and styling to showcase the product in the best possible way. A well-executed product photograph can create a lasting impression and make a product stand out from the competition.
When it comes to online shopping, the visual experience is everything. Customers want to be able to see the product up close and personal, as if they were holding it in their hands. They want to examine the texture, the color, and the fine details that make a product unique. This is where product photography comes into play.
The Role of Visuals in Online Shopping
In the digital world, a picture truly speaks a thousand words. When a customer lands on an Amazon product page, the first thing that captures their attention is the product image. Visuals have the power to convey information about the product, create an emotional connection, and catch the customer’s eye. A well-crafted product image is often the deciding factor in whether a customer decides to make a purchase or move on to a different listing.
Product photography is not just about showing what a product looks like; it is about telling a story. It is about evoking emotions and creating a connection between the customer and the product. A carefully staged product photograph can transport the customer to a different world, where they can imagine themselves using the product and experiencing the benefits it offers.
Furthermore, visuals have the ability to communicate the quality and craftsmanship of a product. A poorly lit and blurry image can give the impression of a low-quality product, while a well-lit and perfectly composed image can make even an ordinary product look extraordinary. Customers want to feel confident in their purchase, and high-quality product images play a crucial role in building that confidence.
How Quality Images Influence Buyer Decisions
High-quality product images have a significant impact on buyer decisions. Clear, crisp, and visually appealing images instill confidence in the customer’s mind about the product’s quality. When customers can see the product from different angles, zoom in to examine the details, and get a sense of the product’s size, they feel more comfortable making a purchase. In fact, studies have shown that listings with professional product images generate higher conversion rates and sales compared to those with low-quality or generic images.
Quality product images not only help customers make informed decisions but also reduce the likelihood of returns and dissatisfied customers. When customers have a clear understanding of what they are purchasing, they are less likely to be disappointed when the product arrives at their doorstep.
Moreover, high-quality product images can also enhance the overall brand image and reputation. When customers see that a brand invests in professional product photography, it conveys a sense of professionalism and attention to detail. This can help build trust and loyalty among customers, leading to repeat purchases and positive word-of-mouth recommendations.
In conclusion, product photography is an essential aspect of online shopping. It has the power to captivate customers, convey information, and influence buying decisions. Investing in high-quality product images is not just a luxury but a necessity in today’s competitive e-commerce landscape.
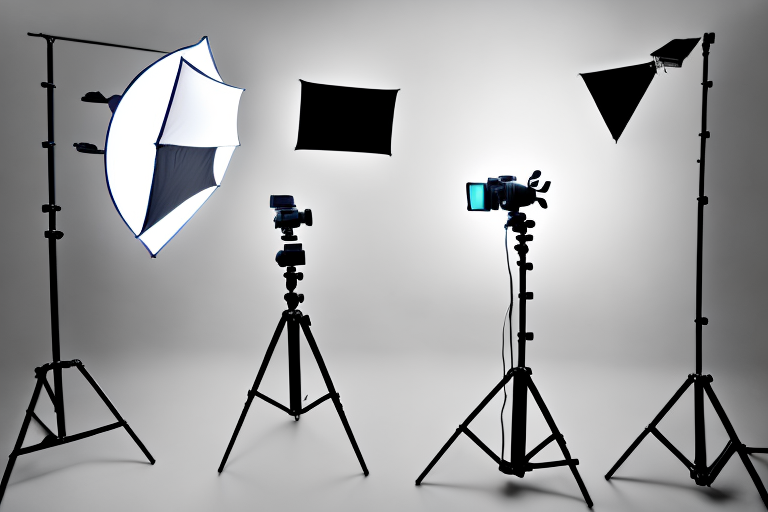
Essential Equipment for Your Amazon Product Photo Studio
To set up a successful Amazon product photo studio, you need the right equipment. Let’s take a look at the key essentials:
Choosing the Right Camera
A high-quality camera is the backbone of your product photography setup. Invest in a camera that offers excellent image resolution, manual control options, and the ability to capture sharp and detailed images. DSLR cameras are a popular choice among professional photographers due to their versatility and image quality.
When selecting a camera for your Amazon product photo studio, consider the sensor size. A larger sensor can capture more light, resulting in better image quality and low-light performance. Additionally, pay attention to the megapixel count, as it determines the level of detail your camera can capture.
Furthermore, look for a camera with interchangeable lenses. This allows you to experiment with different focal lengths and achieve various perspectives for your product photos. Prime lenses with wide apertures are ideal for creating a shallow depth of field, which can make your products stand out against a blurred background.
Importance of Lighting Equipment
Proper lighting is crucial for capturing stunning product images. Invest in a set of studio lights that offer adjustable brightness and color temperature. Softboxes, diffusers, and reflectors can help control the lighting and reduce harsh shadows and reflections.
Consider using a three-point lighting setup, which consists of a key light, fill light, and backlight. The key light is the main light source and provides the primary illumination for your product. The fill light helps to reduce shadows and balance the overall lighting, while the backlight adds depth and separation from the background.
Experiment with different lighting techniques to create the desired mood and highlight the unique features of your products. For example, using a technique called “rim lighting” can create a beautiful halo effect around your product, making it appear more three-dimensional.
Selecting the Perfect Backdrop
A well-chosen backdrop can enhance the overall aesthetic of your product images. Consider using a plain white backdrop for a clean and professional look. Alternatively, experiment with colored backdrops or textured surfaces to add a unique touch to your product photos.
When selecting a backdrop, pay attention to its material and texture. Seamless paper backdrops are a popular choice as they provide a smooth and consistent background. Vinyl backdrops are durable and easy to clean, making them suitable for product photography. Fabric backdrops offer a more textured and natural look, adding depth and visual interest to your images.
Furthermore, consider the size of the backdrop. Ensure it is large enough to accommodate your products without any distractions or visible edges. A larger backdrop also allows you to experiment with different compositions and angles.
Tripods and Other Supporting Tools
Using a tripod ensures stability and eliminates camera shake, resulting in tack-sharp images. Look for a sturdy tripod that can support the weight of your camera and lens. Consider features such as adjustable height, quick-release plates, and a ball head for easy positioning.
In addition to a tripod, invest in other supporting tools such as remote shutter releases, product stands, and clamps. A remote shutter release allows you to trigger the camera without touching it, minimizing the risk of camera shake. Product stands and clamps can help position and hold your products in place during the photoshoot, allowing you to capture them from different angles and perspectives.
Furthermore, consider using a tethering system that allows you to connect your camera to a computer or tablet. This enables you to view the images in real-time on a larger screen, making it easier to check for any imperfections and make adjustments as needed.
Setting Up Your Studio Space
Creating an efficient and organized studio space is essential for product photography. Let’s explore some key considerations:
Finding the Ideal Location
Choose a space with ample natural light, or if natural light is limited, ensure you have sufficient artificial lighting options. The space should also be free from distractions and have enough room to accommodate your photography equipment, props, and products.
Arranging Your Studio Layout
Arrange your studio equipment in a way that allows for easy movement and access during the photoshoot. Create a dedicated area for product placement and a separate space for camera equipment and props. Consider setting up a workstation where you can edit and process the images after the photoshoot.
Managing Light and Shadows
Experiment with different lighting setups to achieve your desired results. Depending on the product and the desired effect, you may need to adjust the position, intensity, and direction of the lights. Additionally, use diffusers and reflectors to soften or redirect the light to minimize harsh shadows and create a more balanced exposure.
The Art of Product Photography
Now that you have set up your Amazon product photo studio, it’s time to explore the art of product photography. Here are some tips to help you capture captivating product images:
Mastering Product Placement
Avoid cluttered compositions and focus on presenting the product in the best possible way. Experiment with different angles, product arrangements, and props to create visually appealing images that highlight the key features of the product.
Experimenting with Angles and Perspectives
Don’t be afraid to get creative with your camera angles and perspectives. Capture close-up shots to showcase product details, shoot from above for a unique vantage point, or try low-angle shots to add a sense of drama. Different angles can evoke different emotions and make your product images stand out.
Understanding Color and Contrast
Color plays a significant role in product photography. Consider the psychology of color and how it relates to your product’s messaging and target audience. Experiment with different color combinations and use contrasting elements to make your product pop. Additionally, ensure the product color in your images accurately represents the real-life product.
By following this ultimate guide, you can set up your own Amazon product photo studio and capture stunning images that entice buyers and drive sales. Remember to continuously improve your skills and experiment with different techniques to stay ahead in the highly competitive e-commerce landscape. Happy shooting!
Take Your Amazon Sales to the Next Level with Your eCom Agent
Now that you’re equipped with the knowledge to set up a professional Amazon product photo studio, it’s time to amplify your success with Your eCom Agent. Our AI-powered tools are designed to streamline your Amazon selling process, from developing better products to enhancing your detail pages. Say goodbye to the tedious hours of manual work and embrace the efficiency of AI. Subscribe to Your eCom Agent’s AI Tools today and transform your Amazon business with the power of artificial intelligence.