
If you sell products on Amazon, having high-quality product images is essential. In this guide, we will walk you through everything you need to know about setting up a product photo studio specifically for Amazon.
Understanding Amazon’s Product Photography Requirements
First and foremost, let’s talk about the importance of high-quality product images. When a potential customer is browsing through Amazon, they heavily rely on product images to make purchasing decisions. Clear, detailed, and visually appealing images increase the chances of attracting customers and boosting sales.
Before we begin: Every Amazon Seller needs a suite of tools for Keyword Research, Product Development, and Listing Optimization. Our top pick is Helium 10 and readers of this post can get 20% off their first 6 months by clicking the image below.

But what makes a product image truly high-quality? It’s not just about having a sharp and well-lit photo. It’s also about capturing the essence of your product and showcasing its unique features. For example, if you’re selling a piece of jewelry, you want to make sure that the image captures the sparkle of the gemstones and the intricate details of the design. This attention to detail can make all the difference in convincing a customer to click that “Add to Cart” button.
Now, let’s delve into Amazon’s specific technical requirements for product photos. These guidelines ensure that your images will be displayed properly and consistently across the Amazon marketplace, giving your products a professional look.
One important requirement is the minimum image dimensions. Amazon recommends that your product images have a minimum resolution of 1000 pixels on the longest side. This ensures that the images are clear and detailed, allowing customers to zoom in and examine the product closely. It’s crucial to meet this requirement to provide potential buyers with a comprehensive view of your product.
In addition to the dimensions, Amazon also specifies the acceptable file formats for product photos. JPEG is the preferred format, as it offers a good balance between image quality and file size. This format is widely supported and ensures compatibility across different devices and browsers. By adhering to this requirement, you can reach a larger audience and provide a seamless shopping experience for your customers.
Another aspect that Amazon emphasizes is the background color of your product images. The marketplace requires a pure white background, which helps to highlight the product and eliminate distractions. This clean and consistent background creates a professional and cohesive look across your product listings. It’s worth investing time and effort into ensuring that your images meet this requirement, as it can significantly enhance the overall presentation of your products.
In conclusion, understanding and meeting Amazon’s product photography requirements is crucial for success on the platform. By providing high-quality images that adhere to the technical guidelines, you can attract more customers, increase sales, and establish a professional brand presence. So, take the time to capture the essence of your products and present them in the best possible light, both figuratively and literally.
Essential Equipment for Your Product Photo Studio
Now that you understand the importance of product images and the requirements set by Amazon, let’s dive into the essential equipment you’ll need for your product photo studio.
Creating stunning product images requires more than just a camera and a subject. To truly capture the essence of your products and make them stand out, you’ll need the right equipment and tools. Let’s explore some of the key elements that will elevate your product photography to the next level.
Choosing the Right Camera
A high-quality camera is a must-have for capturing crisp and detailed product images. While smartphones have come a long way in terms of camera capabilities, they still can’t match the versatility and image quality of a dedicated camera. Investing in a DSLR or mirrorless camera that offers manual controls and a variety of lens options will give you full control over the image capture process.
With a DSLR or mirrorless camera, you can experiment with different focal lengths and apertures to achieve the desired depth of field and bokeh effect. This level of control allows you to highlight specific details or create a soft, dreamy background that draws attention to your product.
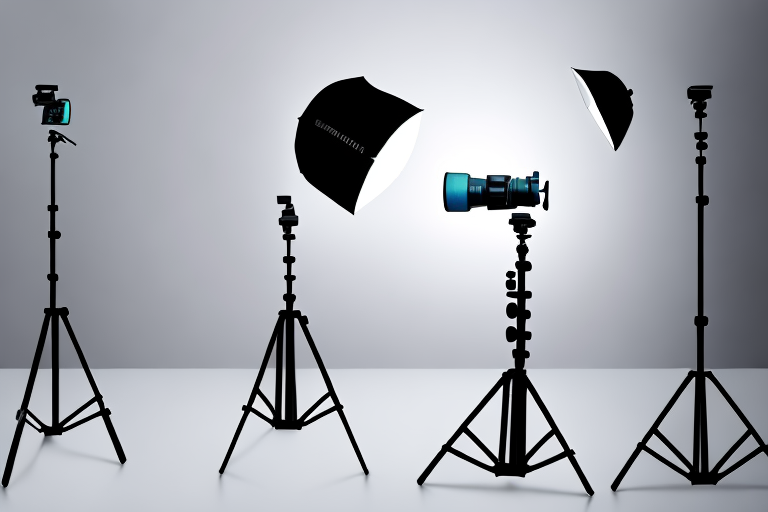
Importance of Lighting Equipment
Good lighting is crucial in product photography. It not only illuminates your subject but also sets the mood and enhances the overall aesthetic appeal of your images. While natural light can work well in certain situations, it’s often inconsistent and uncontrollable.
Investing in photography lighting equipment will give you the ability to control and manipulate the lighting to bring out the best in your products. Softboxes, for example, diffuse the light and create a soft, even illumination that minimizes harsh shadows. Studio strobes, on the other hand, provide powerful and consistent lighting, making them ideal for capturing intricate details and achieving professional-looking results.
Additionally, consider using reflectors and diffusers to further modify the light. Reflectors bounce light back onto the subject, filling in shadows and adding a touch of brightness. Diffusers, on the other hand, soften and spread the light, reducing harsh highlights and creating a more pleasing and natural look.
Selecting the Perfect Backdrop
The backdrop you choose for your product images can greatly impact their overall look and feel. It serves as a canvas that complements and enhances your products, without distracting from them.
Opt for a clean and neutral background that doesn’t compete for attention with your products. Seamless paper rolls or fabric backdrops in white or light gray are popular choices, as they provide a simple and timeless look that works well with a wide range of products. However, don’t be afraid to experiment with different colors and textures to create a unique visual identity for your brand.
Remember, the backdrop should be versatile enough to accommodate various product sizes and shapes. Consider using a backdrop stand or mounting system to ensure a smooth and wrinkle-free surface, allowing your products to take center stage.
By investing in the right camera, lighting equipment, and backdrop, you’ll be well-equipped to create stunning product images that capture the attention of potential customers. Remember to experiment, learn from your results, and continuously refine your techniques to achieve the best possible outcome.
Setting Up Your Product Photo Studio
Now that you have all the necessary equipment, it’s time to set up your product photo studio. Creating a well-organized and efficient studio space is crucial for capturing high-quality product images that will attract customers and increase sales. Let’s explore some essential steps to help you set up your studio and achieve professional-looking photographs.
Finding the Ideal Space
The first step in setting up your product photo studio is to find the ideal space. Look for a room in your home or office that offers enough room to accommodate your studio setup. Consider the size of your products and the equipment you will be using. It’s important to have enough space to move around comfortably and position your products and lighting equipment effectively.
Additionally, try to find a space with good natural light or one that can be easily adapted to accommodate your photography lighting equipment. Natural light can provide a soft and flattering illumination for your products, while artificial lighting can give you more control over the lighting conditions.
Arranging Your Studio Equipment
Once you have found the perfect space, it’s time to arrange your studio equipment. Start by positioning your camera, lighting equipment, and backdrop in a way that maximizes efficiency and convenience. Consider factors like the size of your products, the angle you want to shoot from, and any specific requirements for certain types of images.
Place your camera on a sturdy tripod to ensure stability and reduce the risk of blurry images. Position it at a height and angle that allows you to capture your products from the most flattering perspective. If you have multiple products of different sizes, consider using adjustable platforms or tables to create different levels and add visual interest to your compositions.
When it comes to lighting, experiment with different setups to achieve the desired effect. Consider using a combination of natural light, artificial lighting, and light modifiers such as softboxes or reflectors. Proper lighting can enhance the details of your products, eliminate shadows, and create a professional look.
Tips for Effective Product Placement
Now that your studio is set up, it’s time to arrange your products for photography. Before placing your products, ensure they are clean and free from any scratches or blemishes. It’s essential to present your products in the best possible condition to attract potential customers.
When arranging your products, consider the composition and angles that will showcase them in the most appealing way. Experiment with different product placements and compositions to find the most visually pleasing arrangement. Don’t be afraid to get creative and think outside the box. Try different props, backgrounds, or even incorporate lifestyle elements to add context and tell a story with your product images.
Remember, the goal is to capture images that not only showcase your products but also evoke emotions and engage your audience. Take your time to experiment and refine your product placement until you achieve the desired results.
By following these steps and paying attention to the details, you can create a professional product photo studio that will help you capture stunning images and elevate your brand’s visual presence.
Mastering the Art of Product Photography
Now that your studio is all set up, it’s time to dive into the art of product photography.
Understanding Angles and Perspectives
Experiment with shooting your products from different angles and perspectives. Frontal shots are common, but don’t be afraid to try overhead shots, close-ups of product details, or even shooting from below for a unique perspective.
The Role of Lighting in Product Photography
Proper lighting plays a crucial role in highlighting product details, textures, and colors. Take the time to experiment with different lighting setups to find the one that best suits the product you’re photographing. Consider using diffusers or reflectors to soften harsh lighting or create interesting shadows.
Post-Production: Editing Your Photos
After capturing your product images, it’s time to perfect them through post-production editing. Use editing software like Adobe Photoshop or Lightroom to enhance colors, adjust brightness and contrast, remove any imperfections, and crop the images to fit Amazon’s specific requirements.
By following this ultimate guide, you’ll be well on your way to setting up a professional product photo studio on Amazon. Remember, investing time and effort into creating high-quality images will significantly boost your chances of standing out in the competitive world of online retail.
Take Your Amazon Business to the Next Level with Your eCom Agent
Now that you’re equipped with the knowledge to set up a professional product photo studio, it’s time to streamline your Amazon business even further. Your eCom Agent offers an innovative suite of AI tools designed to optimize every aspect of your Amazon selling experience. From developing standout products to analyzing customer feedback and enhancing your detail pages, our AI does the heavy lifting for you. Ready to transform your Amazon strategy? Subscribe to Your eCom Agent’s AI Tools today and experience the power of AI for your e-commerce success.