
In the world of online shopping, product photos play a crucial role in attracting and convincing potential customers. While a compelling product description can help to seal the deal, it is the visual representation that initially catches the eye and draws shoppers in. In this comprehensive guide, we will explore the importance of product photos, essential equipment for Amazon product photography, setting up your photography studio, and the art of capturing the perfect shot.
Understanding the Importance of Product Photos
When shopping online, customers are unable to physically see or touch the products they are interested in purchasing. This is where product photos come into play. They provide a visual representation of the item, allowing consumers to evaluate its appearance, quality, and suitability. Without captivating and high-quality product photos, businesses risk losing potential customers to competitors who invest in visual marketing.
Before we begin: Every Amazon Seller needs a suite of tools for Keyword Research, Product Development, and Listing Optimization. Our top pick is Helium 10 and readers of this post can get 20% off their first 6 months by clicking the image below.

Imagine you are browsing an online clothing store. You come across a beautiful dress that catches your eye. However, there is only one photo of the dress, and it is taken from a distance, making it difficult to see the intricate details and fabric texture. As a result, you may hesitate to make a purchase because you are unsure about the actual quality and fit of the dress. On the other hand, if the store provides multiple high-resolution photos that showcase the dress from different angles, close-ups of the fabric, and even a model wearing it, you would have a much better understanding of the product. This visual information helps you make an informed decision and increases the likelihood of completing the purchase.
The Role of Product Photos in Online Shopping
Product photos are the virtual storefront display of your online business. Just as a beautifully decorated brick-and-mortar store attracts customers, visually appealing images are essential to entice online shoppers. When customers visit your website, the first thing they notice are the product photos. These images create a lasting impression and influence their perception of your brand. If the photos are of low quality, poorly lit, or unappealing, it reflects negatively on your business and may deter potential customers from exploring further.
On the other hand, when you invest in high-quality product photos, you showcase your products in the best possible light. Professional photography techniques, such as proper lighting, composition, and styling, can elevate the visual appeal of your products. This attention to detail conveys a sense of professionalism and quality, instilling trust in your potential customers. By presenting your products in an appealing and professional manner, you can build trust, create a positive first impression, and increase customer engagement.
How Quality Photos Impact Customer Decisions
High-quality photos are key to influencing customer decisions. Clear and detailed images help customers visualize the product and make informed purchasing choices. When customers can see the product up close and personal, they can examine its features, colors, textures, and any intricate details that may be important to them.
Imagine you are shopping for a new smartphone. You come across two different online stores selling the same model. Store A has a single photo of the phone, taken from a distance, while Store B provides multiple high-resolution photos that showcase the phone from various angles, highlighting its sleek design, vibrant display, and innovative features. Which store would you be more inclined to trust and make a purchase from? Most likely, Store B, because the detailed product photos give you a better understanding of what you are buying.
In fact, studies have shown that including multiple product photos can increase conversion rates and decrease return rates, as customers feel more confident about their purchases. When customers have a clear visual representation of the product, they are less likely to be disappointed when it arrives at their doorstep. This leads to higher customer satisfaction and loyalty, ultimately benefiting your business in the long run.
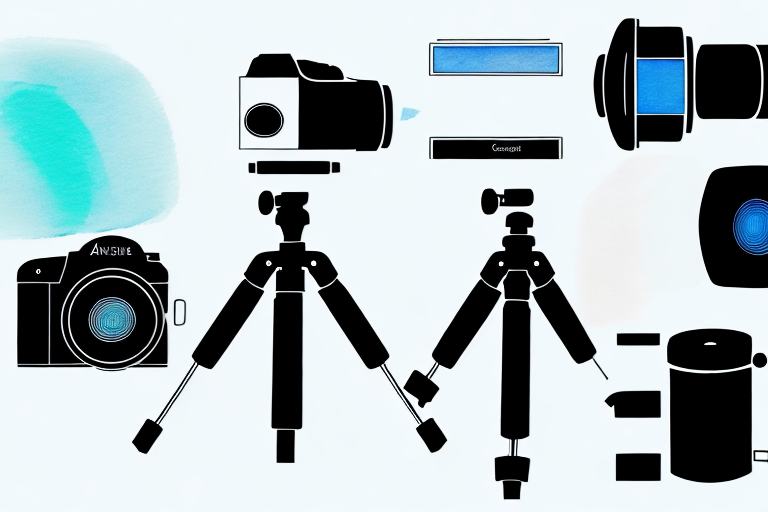
Essential Equipment for Amazon Product Photography
Investing in the right equipment is crucial for achieving professional-looking product photos. Here are some essential tools you will need:
Camera Options: DSLR vs. Smartphone
While a smartphone can capture decent product photos, a DSLR camera offers more control and better image quality. If you are serious about product photography, investing in a DSLR camera with interchangeable lenses is highly recommended.
With a DSLR camera, you have the ability to adjust settings such as aperture, shutter speed, and ISO, allowing you to have more creative control over your images. The larger image sensor in a DSLR camera also helps in capturing more detail and producing sharper images.
Furthermore, the ability to change lenses on a DSLR camera gives you the flexibility to choose the right lens for different types of product shots. Whether you need a wide-angle lens for capturing the entire scene or a macro lens for close-up shots, a DSLR camera allows you to experiment and achieve the desired results.
Importance of Lighting Equipment
Proper lighting is a game-changer for product photography. Investing in lighting equipment, such as softboxes or ring lights, can help to eliminate shadows, create a well-lit environment, and showcase your products in the best possible way.
Softboxes are ideal for diffusing light and creating a soft, even illumination on your subject. They come in various shapes and sizes, allowing you to control the direction and intensity of the light. Ring lights, on the other hand, provide a unique circular illumination that helps to eliminate harsh shadows and create a flattering, evenly-lit look.
Additionally, using reflectors can further enhance your lighting setup. Reflectors bounce light back onto the subject, filling in shadows and adding a touch of brightness to specific areas. They come in different colors, such as silver, gold, and white, each producing a different effect on the light.
Choosing the Right Background
The background you choose for your product photos is important in setting the mood and highlighting the item. Consider using solid color backgrounds, white backdrops, or even lifestyle settings to add context and appeal to your product images.
Solid color backgrounds, such as black or gray, can create a clean and professional look, allowing the product to be the main focus. White backdrops, on the other hand, provide a fresh and minimalist aesthetic, making the product stand out.
For a more lifestyle-oriented approach, you can incorporate props and settings that complement your product. This can help potential customers visualize how the product fits into their lives and inspire them to make a purchase. For example, if you are selling outdoor camping gear, you could set up a campsite scene with a tent, sleeping bags, and a campfire to create a sense of adventure and excitement.
Remember to consider the size and shape of your product when choosing a background. You want to ensure that the background does not overpower or distract from the main subject. Experiment with different options to find the perfect backdrop that enhances your product and captures the attention of potential buyers.
Setting Up Your Photography Studio
Creating a dedicated photography studio space allows you to have full control over the lighting, background, and overall aesthetic of your product photos. Follow these steps to set up your own professional studio:
Selecting the Ideal Space
Choosing the right space for your photography studio is crucial to ensure optimal conditions for capturing stunning product photos. Look for a well-lit area in your home or office that provides enough space to set up your equipment and arrange your products comfortably. Consider utilizing natural light sources such as windows or skylights to bring in soft, diffused light that can enhance the overall quality of your images. If natural light is not sufficient or consistent, you may also consider installing light diffusers or using artificial lighting to create a consistent and controlled lighting setup.
Additionally, it’s important to consider the size of the space. Make sure it is large enough to accommodate your equipment, props, and any additional accessories you may need. Having ample space will allow you to move around freely and experiment with different setups without feeling cramped or restricted.
Arranging Your Lighting Setup
Once you have selected the ideal space for your photography studio, it’s time to set up your lighting. Proper lighting is key to capturing professional-looking product photos that highlight the details and textures of your items.
Position your lights strategically to minimize shadows and achieve the desired effect. Experiment with different angles and intensities to find the perfect lighting setup for your product. Consider using a combination of key lights, fill lights, and backlighting to create dimension and depth in your photos. You may also want to invest in light modifiers such as softboxes, umbrellas, or reflectors to further control and shape the light.
Take the time to test different lighting setups and make adjustments as needed. Pay attention to how the light falls on your products and how it interacts with different materials and surfaces. By fine-tuning your lighting setup, you can create images that truly showcase the unique qualities of your products.
Positioning Your Product
When photographing your products, it’s important to consider their unique features and angles. Experiment with different compositions and perspectives to showcase your items in the most appealing way possible.
Start by selecting a suitable background or backdrop that complements your products and enhances their visual appeal. Consider using a clean, neutral-colored backdrop to keep the focus on the product itself. Alternatively, you can choose a backdrop that adds a touch of personality or reinforces your brand’s aesthetic.
Next, carefully position your product within the frame. Pay attention to the product’s shape, size, and any specific details you want to highlight. Experiment with different angles, orientations, and arrangements to find the most visually pleasing composition. Don’t be afraid to get creative and think outside the box – sometimes a unique perspective can make all the difference in capturing attention and creating a memorable image.
Additionally, consider using props or styling elements that complement your product and help tell a story. These can add depth, context, and visual interest to your photos, making them more engaging and enticing to potential customers.
Remember, practice makes perfect. Take the time to experiment and refine your setup, lighting, and composition techniques. With dedication and attention to detail, you can create a photography studio that produces stunning product photos that truly stand out.
The Art of Product Photography
Product photography is not just about capturing a clear image; it is about telling a story and creating an emotional connection with your audience. Here are some tips to elevate your product photography:
Mastering the Rule of Thirds
The Rule of Thirds is a basic composition principle that divides the frame into nine equal parts using two horizontal and two vertical lines. Positioning your product or key elements along these lines or at the intersecting points can create a visually pleasing and balanced image.
Experimenting with Angles
Don’t be afraid to get creative with your angles. Capture close-ups, bird’s eye views, or unique perspectives to add depth and intrigue to your product images. Different angles can highlight different features and create a more dynamic composition.
The Impact of Colors and Textures
Colors and textures can evoke certain emotions and influence customer perception. Experiment with different backgrounds, props, and color schemes to create a cohesive and visually appealing product photo that aligns with your brand identity.
In conclusion, taking compelling and professional product photos is crucial for success in the competitive world of online shopping. By understanding the importance of product photos, investing in essential equipment, setting up your photography studio, and mastering the art of product photography, you can create captivating images that drive engagement, increase sales, and leave a lasting impression on your customers.
Enhance Your Amazon Product Photography with AI
Ready to take your Amazon product photography to the next level? Subscribe to Your eCom Agent’s AI Tools today and revolutionize the way you manage your Amazon listings. With our advanced AI suite, you can effortlessly analyze product reviews, refine your detail pages, and develop better products faster than ever before. Don’t let manual tasks hold you back—embrace the power of AI and watch your sales soar!