
In the fast-paced world of e-commerce, managing inventory efficiently is crucial for any successful business. Whether it’s excess stock or slow-moving items, there may come a time when you need to remove inventory from Amazon. This comprehensive step-by-step guide will walk you through the process, ensuring a smooth and hassle-free experience.
Understanding Amazon’s Inventory Removal Process
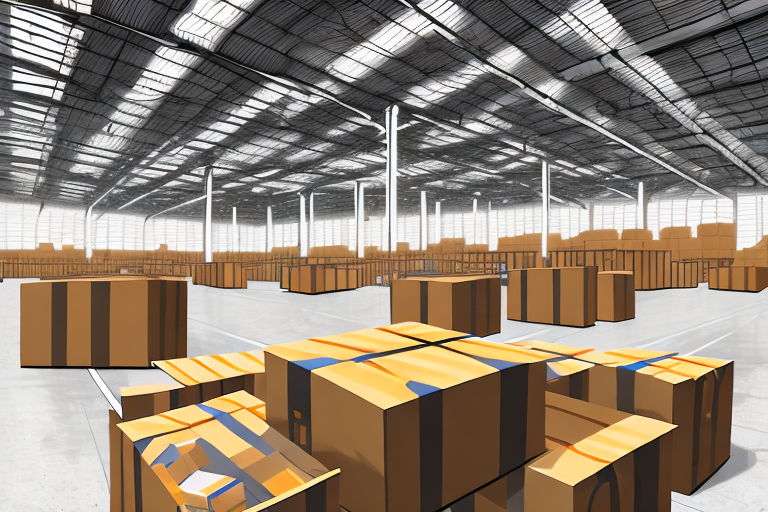
Before diving into the specifics, let’s first familiarize ourselves with the basics of Amazon inventory management. Amazon offers a streamlined inventory removal process to help sellers effectively manage their stock. This process allows you to remove items from Amazon’s fulfillment centers, helping you regain control over your inventory.
Before we begin: Every Amazon Seller needs a suite of tools for Keyword Research, Product Development, and Listing Optimization. Our top pick is Helium 10 and readers of this post can get 20% off their first 6 months by clicking the image below.

The Basics of Amazon Inventory Management
Amazon’s inventory management system provides sellers with valuable insights into their stock levels, sales performance, and customer feedback. It allows you to track each item’s availability, monitor sales velocity, and make informed decisions about replenishment.
With Amazon’s system, you can prevent overstocking by accurately predicting demand, optimize inventory turnover by identifying fast-selling items, and avoid unnecessary storage fees by efficiently managing stock levels. By effectively managing your inventory, you can ensure that you always have the right products available for your customers, leading to improved profitability and increased customer satisfaction.
Reasons for Removing Inventory from Amazon
There are several reasons why sellers may need to remove inventory from Amazon. One common reason is unexpected changes in demand. For example, a product that was once popular may suddenly lose its appeal, leaving sellers with excess stock. By promptly removing this inventory, sellers can free up storage space and allocate resources to more in-demand products.
Seasonal fluctuations also play a role in inventory removal. Certain products may experience a surge in demand during specific seasons, such as holiday-themed items. Once the season is over, sellers may need to remove the remaining inventory to make room for other products.
Another reason for removing inventory is to mitigate the risk of poor-quality or damaged goods reaching customers. Maintaining a high standard of product quality is crucial for sellers, as negative reviews and returns can harm their reputation. By promptly removing any items that fall short of this standard, sellers can ensure that only top-quality products are available to customers.
Additionally, sellers may need to remove inventory due to product recalls or safety concerns. If a product is found to be defective or poses a safety risk, it is essential to remove it from circulation to protect customers and comply with regulatory requirements.
Overall, the inventory removal process offered by Amazon provides sellers with the flexibility and control needed to effectively manage their stock. By promptly addressing changes in demand, maintaining product quality, and complying with safety regulations, sellers can optimize their inventory and ensure a positive customer experience.
Preparing for Inventory Removal
Before initiating the inventory removal process, it’s important to follow a few preparatory steps to ensure a seamless experience.
Removing excess or slow-moving inventory from your Amazon fulfillment centers can be a strategic move to optimize your business operations and improve overall sales performance. However, it requires careful planning and consideration of various factors.
Identifying Excess or Slow-Moving Inventory
The first step is to identify which items in your inventory are excess or slow-moving. Analyzing sales data and monitoring customer demand will help pinpoint products that have not been selling as anticipated or are no longer in high demand.
By conducting a thorough analysis, you can gain valuable insights into your inventory’s performance and make informed decisions about whether to remove specific items from Amazon’s fulfillment centers. This process allows you to optimize your inventory levels and allocate resources more effectively.
Furthermore, identifying slow-moving inventory provides an opportunity to reassess your marketing strategies. You can explore different approaches to boost the visibility and sales performance of these products, such as optimizing product listings, enhancing product images, or implementing targeted advertising campaigns.
Assessing the Costs of Inventory Removal
It’s important to consider the costs associated with removing inventory from Amazon. These costs may include removal fees, shipping expenses, and potential disposal costs. Evaluating these expenses beforehand will help you determine if it’s financially viable to remove the inventory.
By carefully assessing the costs, you can weigh the potential benefits of inventory removal against the financial implications. This analysis allows you to make informed decisions that align with your business goals and financial objectives.
Additionally, it’s worth considering alternative options before initiating the removal process. Lowering prices, running promotions, or exploring new marketing strategies can help stimulate sales and potentially reduce the need for inventory removal.
By implementing these alternative strategies, you may be able to revive the demand for slow-moving inventory and avoid the costs associated with removal. It’s important to explore all possibilities before making a final decision.
In conclusion, preparing for inventory removal involves a thoughtful and strategic approach. By identifying excess or slow-moving inventory and assessing the associated costs, you can make informed decisions that optimize your business operations and drive overall sales performance.
Step-by-Step Guide to Removing Inventory
Navigating to the Manage Inventory Page
To begin the inventory removal process, log in to your Amazon Seller Central account and navigate to the “Manage Inventory” page. This page provides you with an overview of all your listed products.
Once you have successfully logged in to your Amazon Seller Central account, you will be greeted by a user-friendly interface that allows you to manage various aspects of your selling business. One of the key features of this interface is the “Manage Inventory” page, where you can easily access and control your inventory.
On the “Manage Inventory” page, you will find a comprehensive list of all the products you have listed on Amazon. This list includes important details such as product titles, ASINs, prices, and stock levels. It serves as a centralized hub for you to monitor and manage your inventory effectively.
Now that you have reached the “Manage Inventory” page, you are ready to proceed with removing the specific items you no longer wish to sell. To do this, you will need to locate the items within your inventory.
Locating the items you wish to remove can be done in a few different ways. One option is to conduct a search using keywords or specific product information. This allows you to quickly find the items you are looking for, especially if you have a large inventory. Another option is to use the filtering feature, which allows you to narrow down your inventory based on specific criteria.
For example, if you only want to remove items from a certain product category, you can use the category filter to display only those products. Similarly, if you want to remove items that have low stock levels or poor sales performance, you can apply the relevant filters to identify those specific items.
Selecting the Items for Removal
Once you have located the items you wish to remove from your inventory, it’s time to select them for removal. Amazon provides a simple and intuitive process for selecting multiple items at once, making it efficient to remove items in bulk.
To select multiple items, you can use the checkboxes next to each product listing. Simply click on the checkboxes of the items you want to remove, and they will be highlighted. If you want to select all items on the page, you can use the “Select All” checkbox, which is usually located at the top of the list.
If you have a large inventory and the items you want to remove are spread across multiple pages, you can use the pagination feature to navigate through the pages and select the items accordingly. This ensures that you don’t miss any items during the removal process.
Once you have selected the items you want to remove, you are ready to proceed to the next step of the inventory removal process. This step involves confirming your selection and initiating the removal request, which will be covered in the following section.
Enhance Your Amazon Selling Experience with AI
Ready to take your Amazon inventory management to the next level? Subscribe to Your eCom Agent’s AI Tools and discover the power of artificial intelligence in optimizing your e-commerce strategy. From developing standout products to analyzing customer feedback and perfecting your detail pages, Your eCom Agent streamlines complex tasks into seconds of simplicity. Don’t let manual processes hold you back—embrace the future of Amazon selling today!